Database Setup
Overview
The Database Setup for Vineforce Teams on-premise deployment uses a dedicated Docker migrator image that automatically creates the complete database schema, including all tables, views, stored procedures, and security configurations. This approach simplifies deployment by eliminating manual script execution and ensures consistent schema creation across environments.
The migrator image vineforce/vineforce-teams-db:main handles:
- Database creation (if it doesn't exist)
- Schema creation with all required tables and views
- Stored procedure installation
- Index and constraint creation
- Security permission configuration
Prerequisites
Before running the database migration, ensure you have:
- Docker: Installed and running on your deployment machine
- SQL Server: A running SQL Server instance accessible from the Docker host
- Database Credentials: SQL Server login with permissions to create databases and schema objects
- Network Access: Connectivity from the Docker host to the SQL Server instance
Step-by-Step Database Migration
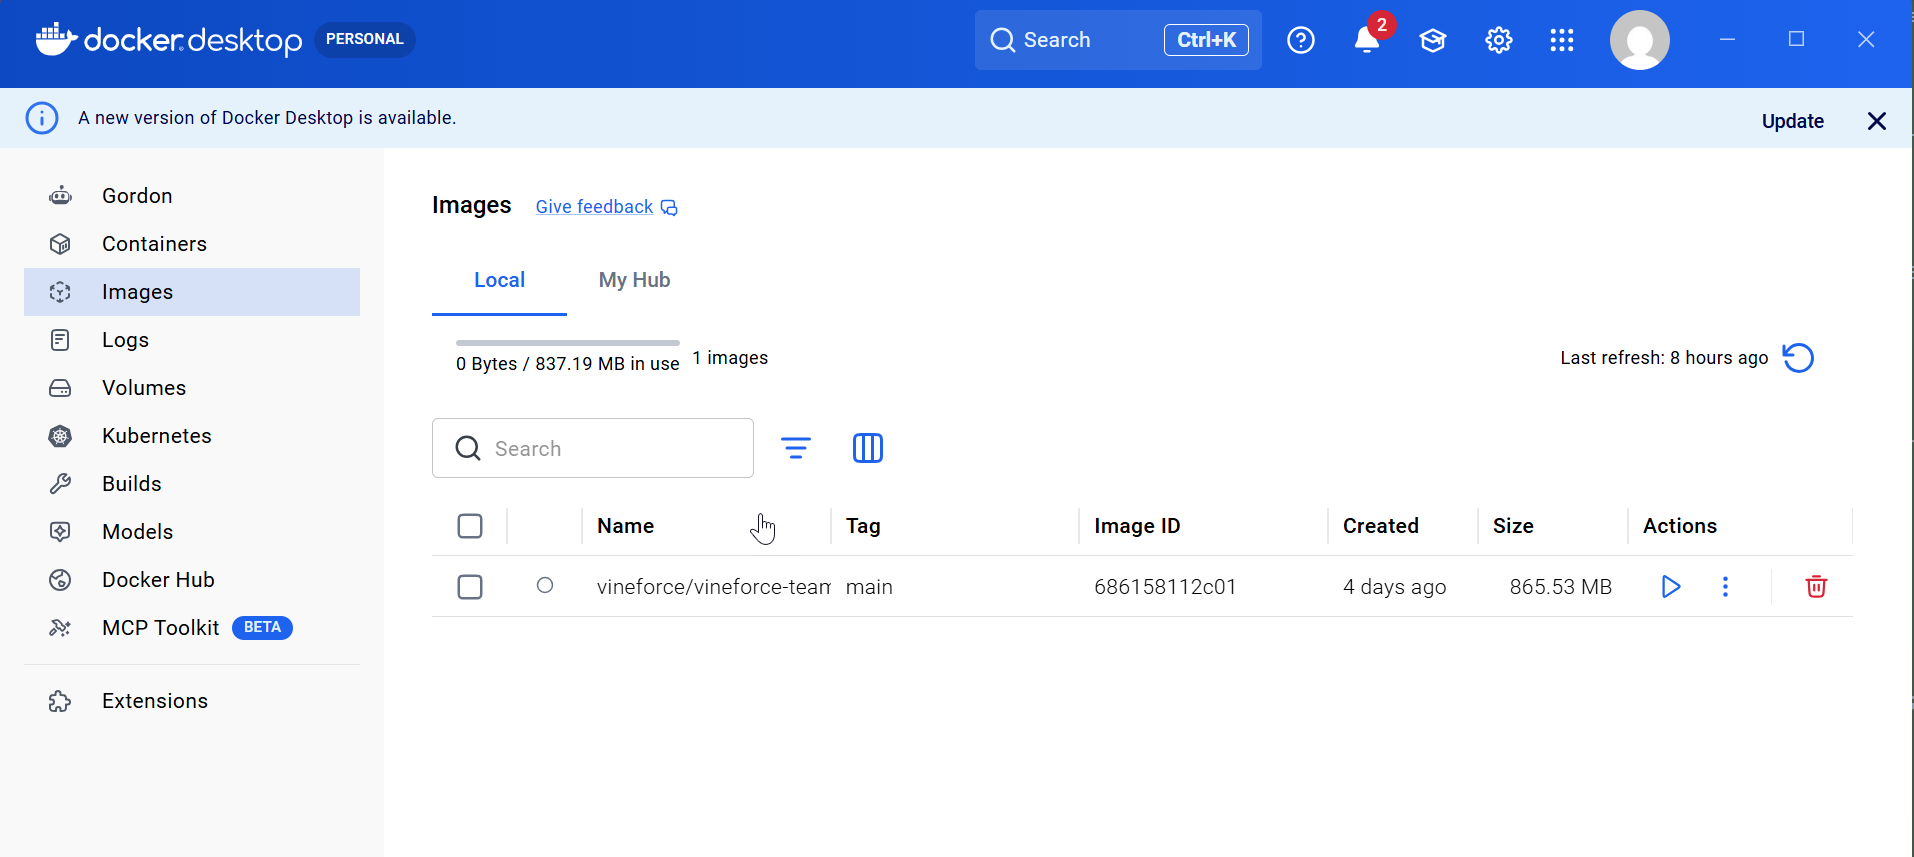
Step 1: Pull the Database Migrator Image
Pull the latest version of the Vineforce Teams database migrator image from Docker Hub:
docker pull vineforce/vineforce-teams-db:main
This command downloads the image to your local Docker installation.
Step 2: Prepare Connection String
You need a valid SQL Server connection string with permissions to create databases and tables. The connection string should connect to the master database initially, as the migrator will create the target database.
Connection String Format:
Server=your-server-name;Database=master;User Id=your-username;Password=your-password;TrustServerCertificate=true;
Required Permissions:
CREATE DATABASEpermission (to create the VineforceTeams database)CREATE TABLE,CREATE VIEW,CREATE PROCEDUREpermissionsALTERpermissions on the target database
Step 3: Run the Database Migration
Execute the migrator image with your connection string. The command will create the database and apply the complete schema:
docker run --rm --name vineforce-teams-db `
  -e ASPNETCORE_ENVIRONMENT=Production `
  -e ConnectionStrings__Default="Server=your-server-name;Database=master;User Id=your-username;Password=your-password;TrustServerCertificate=true;" `
 vineforce/vineforce-teams-db:main
Migration Parameters
The migrator accepts the following environment variables:
| Variable | Description | Default | Example |
|---|---|---|---|
CONNECTION_STRING | Full SQL Server connection string (required) | - | Server=sql-server.example.com;Database=master;User Id=sa;Password=YourStrongPassword123!;TrustServerCertificate=true; |
DATABASE_NAME | Target database name | VineforceTeams | VineforceTeams |
CREATE_DATABASE | Whether to create the database if it doesn't exist | true | true |
Step 4: Verify Migration Success
After running the command, check for successful completion messages:
2026-08-11 23:19:23 | HOST database migration started...
2026-08-11 23:19:23 | ---------------------------------------------------
2026-08-11 23:19:23 | Connection string:  Data Source=host.docker.internal,1433;Initial Catalog=VineforceDb15003;User ID=XXXXX;Password=XXXXX;Trust Server Certificate=True
2026-08-11 23:19:23 | ---------------------------------------------------
2026-08-11 23:19:36 | Database schema for VineforceDb15003 updating...
2026-08-11 23:19:36 | DACPAC file path: /app/Vineforce.Admin.Database.dacpac
2026-08-11 23:19:44 | Database schema for VineforceDb15003 updated.
2026-08-11 23:19:44 | HOST database migration completed.
2026-08-11 23:19:44 | --------------------------------------------------------
2026-08-11 23:19:44 | All databases have been migrated.
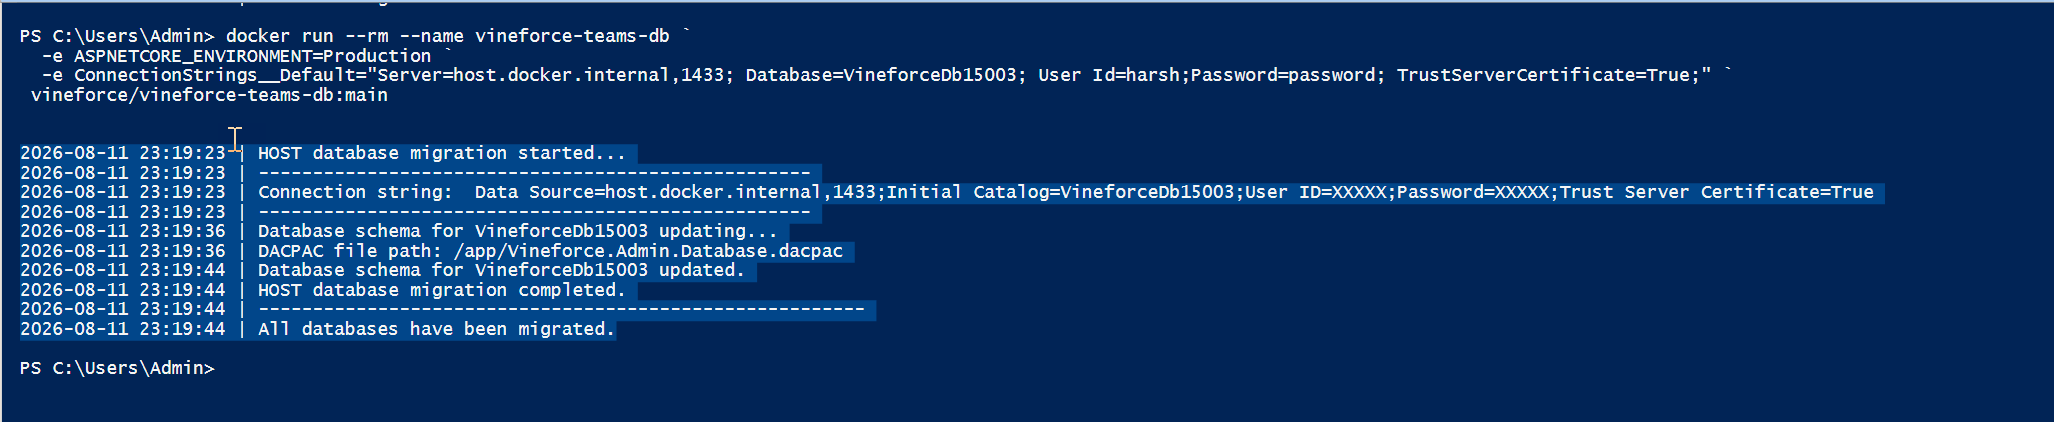
In our example we have used local database, but you can use live (MS SQL) database.
Docker Compose Alternative
For local development or testing environments, you can use a Docker Compose setup:
version: '3.8'

services:
  db-migration:
    image: vineforce/vineforce-teams-db:main
    environment:
      CONNECTION_STRING: "Server=host.docker.internal;Database=master;User Id=sa;Password=YourStrongPassword123!;TrustServerCertificate=true;"
      DATABASE_NAME: "VineforceTeams"
      CREATE_DATABASE: "true"
    volumes:
      - db-data:/var/lib/mssqldata
    command: --verbose

volumes:
  db-data:
Troubleshooting Migration Issues
Common Error Messages
| Error Message | Cause | Solution |
|---|---|---|
| "Cannot connect to SQL Server" | Network or authentication issue | Verify server name, port, and credentials; check firewall rules |
| "Access denied for user" | Insufficient permissions | Use account with CREATE DATABASE and CREATE TABLE permissions |
| "Database already exists" | Database already created | Set CREATE_DATABASE=false or delete existing database first |
| "Permission denied" | Missing database permissions | Grant necessary permissions or use administrator account |
| "Login failed for user" | Invalid credentials | Check SQL Server login and password in connection string |
Migration Logs
The migrator writes detailed logs to the console. For production deployments, capture these logs:
docker run --rm \
  -e CONNECTION_STRING="your-connection-string" \
  vineforce/vineforce-teams-db:main \
  > migration.log 2>&1
Post-Migration Checklist
After running the migrator, verify:
- Database created successfully
- All required tables present
- Stored procedures created
- Indexes and constraints applied
- Security permissions configured
- Database backups created
- Application connection strings updated
Security Note: Store your database connection strings securely. Never commit them to source control or share them in documentation. Use Azure Key Vault or similar secure storage solutions in production.
What's Next?
After completing the database migration, proceed with:
- Web Application Installation: Set up the central management interface using the same connection string
- Desktop Application Deployment: Install tracking clients on user systems
- Configuration Setup: Configure Vineforce Teams settings and integration
- Testing and Validation: Verify complete deployment before production use
A properly migrated database is critical for reliable and secure Vineforce Teams operation. Follow this setup guide carefully and test all procedures before moving to production.