Uninstall Vineforce Teams | Windows
Windows 10 / 11
This guide explains how to manually remove the Vineforce Teams desktop application from your Windows computer.
Prerequisites
Before uninstalling:
- Close Vineforce Teams if it is currently running.
- Save any unsaved work before removing the application.
- Administrator privileges may be required depending on your organization's policies.
Step 1: Open Installed Apps
Open the Start menu and search for Installed Apps (or Apps & Features on some versions of Windows).
Alternatively, open:
Settings → Apps → Installed Apps
Step 2: Locate Vineforce Teams
In the list of installed applications, search for Vineforce Teams.
Select the application to view the available options.
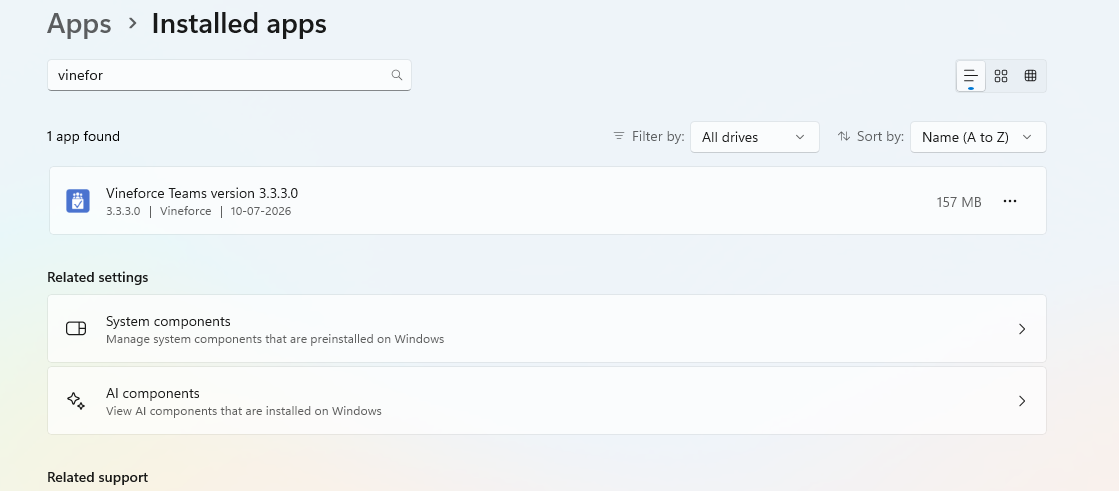
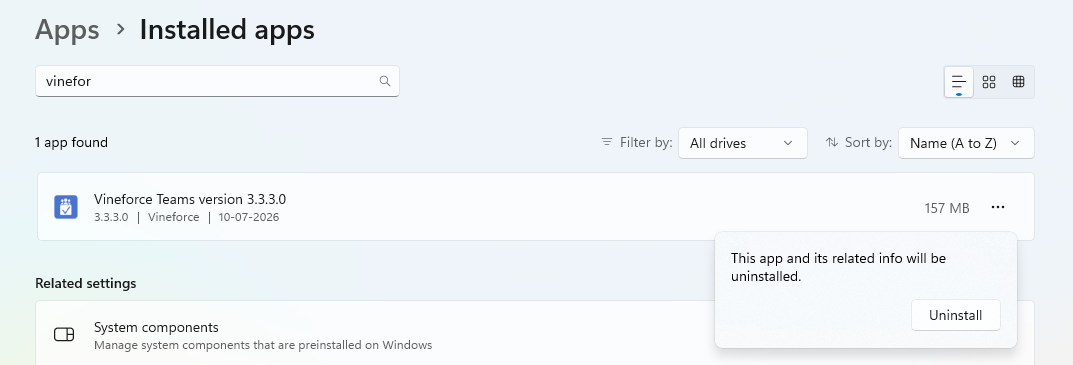
Step 3: Uninstall Vineforce Teams
Click Uninstall.
If Windows displays a confirmation dialog, click Uninstall again to continue.
Step 4: Complete the Uninstallation
Wait while Windows removes Vineforce Teams from your computer.
Once the process is complete, the application will no longer appear in the list of installed applications.
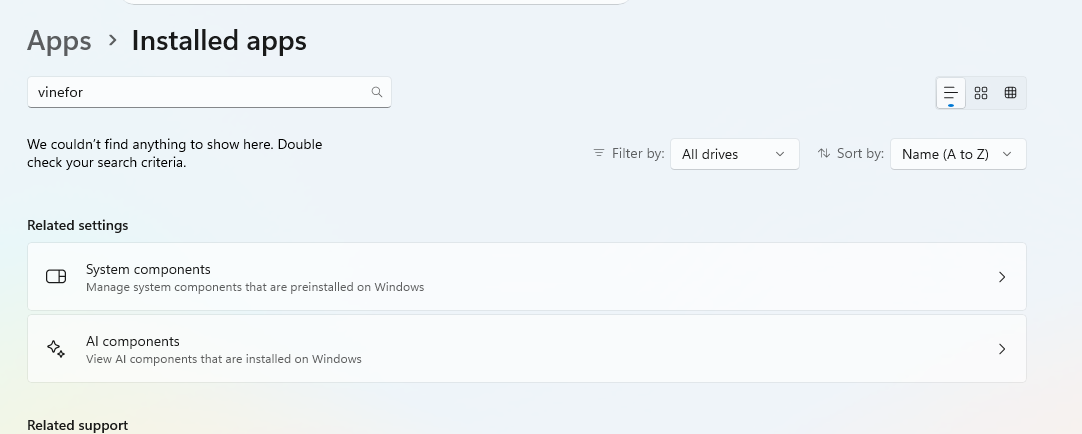
Uninstallation Complete
Congratulations!
Vineforce Teams has been successfully removed from your Windows computer.
Troubleshooting
| Problem | Solution |
|---|---|
| Unable to uninstall the application | Ensure Vineforce Teams is closed before uninstalling. |
| Uninstall option is unavailable | Restart your computer and try again with an administrator account. |
| The application still appears after uninstalling | Restart your computer to complete the removal process. |
Best Practices
- Close Vineforce Teams before uninstalling.
- Restart your computer after uninstalling if prompted.
- Reinstall the latest version if you plan to continue using Vineforce Teams.
What's Next?
If you need to install Vineforce Teams again, follow the Install Vineforce Teams on Windows guide in this documentation.