Uninstall Vineforce Teams Lite on macOS
macOS | Complete Removal
- Purpose: Completely remove Vineforce Teams Lite, its auto-start agent, and all data.
- Navigation: Open
Activity Monitorand theTerminalapplication on your Mac. - Key Action: Force quit the app, stop background processes, and remove the data folders.
- Outcome: A clean system with no trace of the Vineforce Teams Lite application.
This guide provides the complete steps to remove the Vineforce Teams Lite application, its background auto-start agent, and all associated data folders from your macOS system.
Step 1: Force Quit from Activity Monitor
First, you must quit the application from the Activity Monitor.
- Open Activity Monitor (you can find it in
Applications > Utilitiesor by searching in Spotlight). - Search for "Vineforce Teams Lite".
- Select the process and click the Stop (X) button at the top.
- Choose Force Quit when prompted.
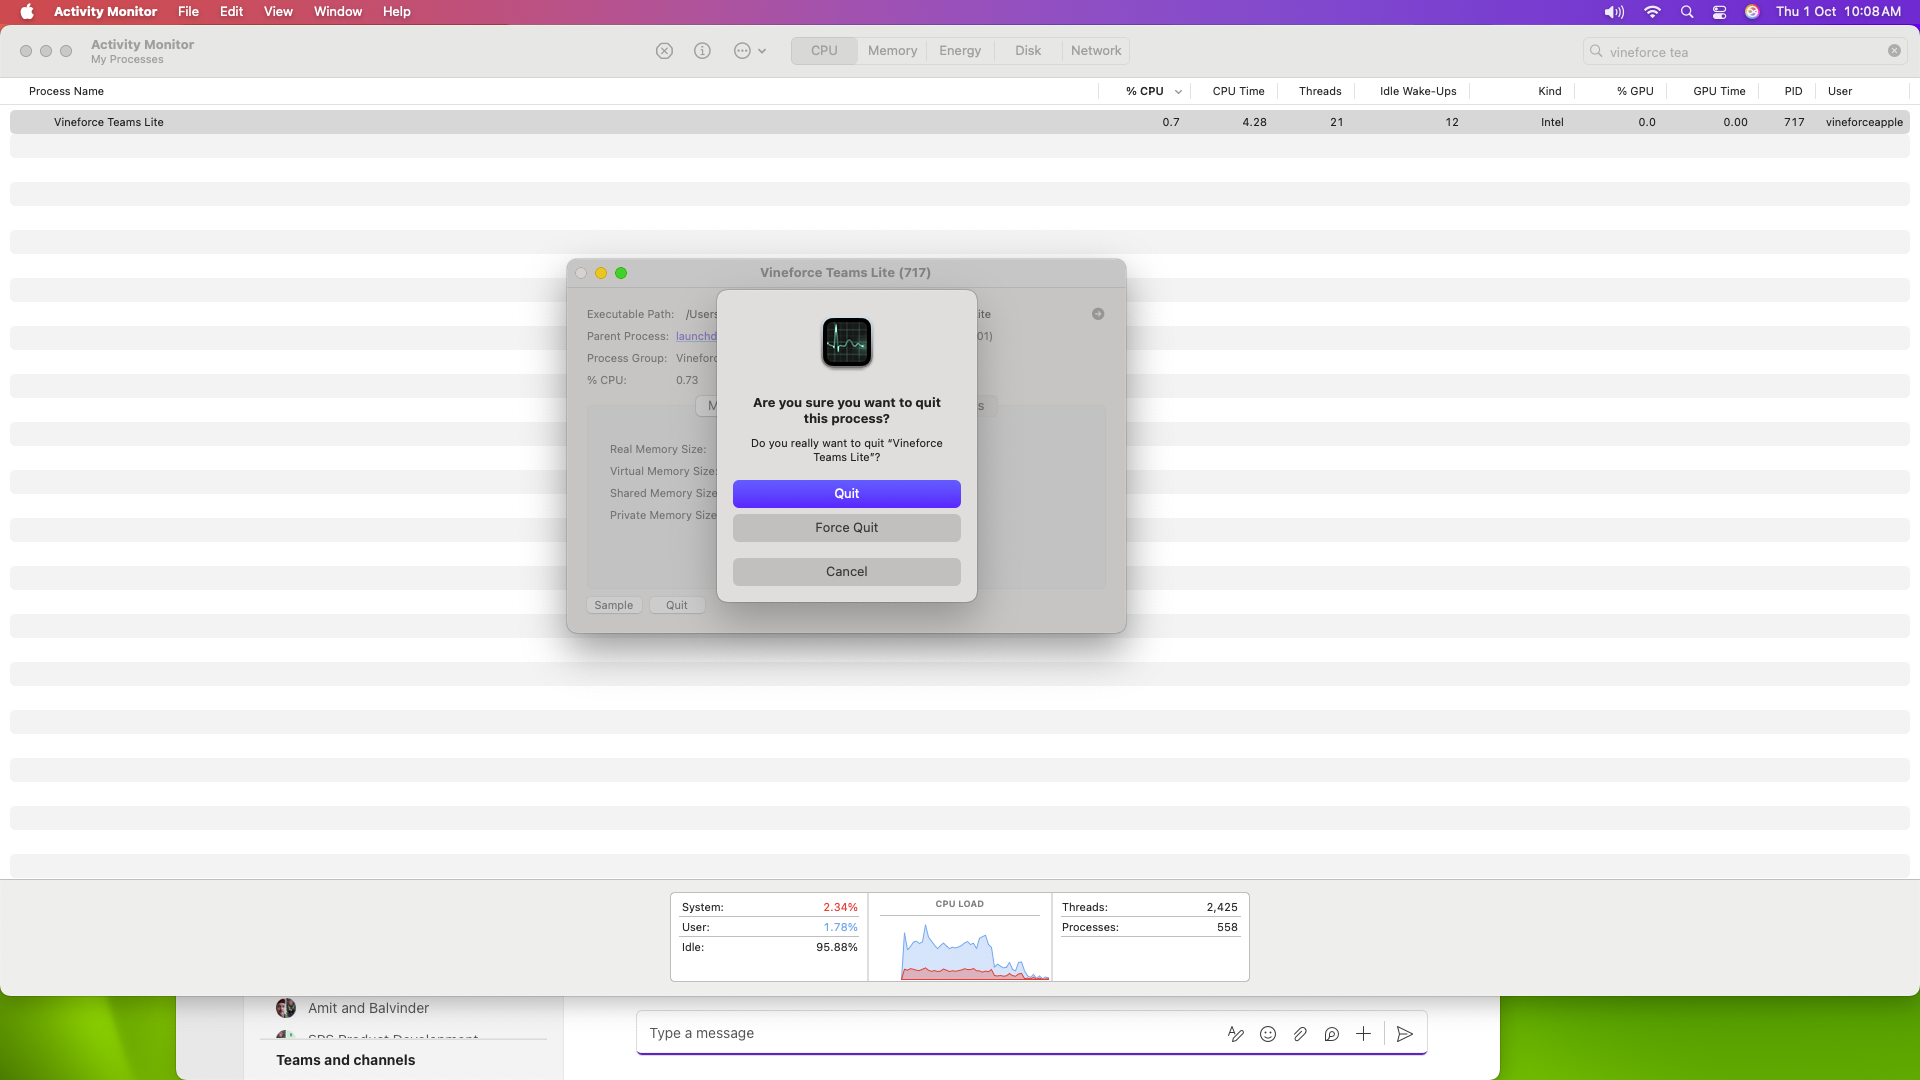
Step 2: Stop the Running App via Terminal
Open your Terminal application and ensure that no lingering background processes are running by executing the following command:
pkill -f "Vineforce Teams Lite"
Step 3: Remove the Auto-Start Agent
Next, unload and delete the launch agent that automatically starts the app. Run these commands in order:
launchctl unload -w "$HOME/Library/LaunchAgents/com.vineforce.teamslite.plist" 2>/dev/null
rm -f "$HOME/Library/LaunchAgents/com.vineforce.teamslite.plist"
Step 4: Remove All App Data Folders
Now, remove the application data folders.
This step also covers the Logs and Screenshots subfolders, since they live inside ~/Library/Application Support/.vineforce. There's no need to delete those separately.
Execute the following commands:
rm -rf "$HOME/.vineforce"
rm -rf "$HOME/.local/share/.vineforce"
rm -rf "$HOME/Library/Application Support/.vineforce"
Note: Steps 2 through 4 are the only commands actually needed to fully uninstall — run them in order, top to bottom.
Step 5: Verify Complete Removal (Optional)
The following steps are optional checks to confirm the uninstall worked successfully.
Verify Files are Gone
Run the following script block to confirm that the directories and files have been removed:
for p in "$HOME/.vineforce" "$HOME/.local/share/.vineforce" "$HOME/Library/Application Support/.vineforce" "$HOME/Library/LaunchAgents/com.vineforce.teamslite.plist"; do
  [ -e "$p" ] && echo "STILL THERE: $p" || echo "removed: $p"
done
If successful, you will see removed: printed for each path.
Confirm Nothing is Still Running
Check that no Vineforce processes remain in your system's memory:
launchctl list | grep -i vineforce
ps aux | grep -i vineforce
If both commands return nothing, the uninstallation is complete.
Frequently Asked Questions (FAQ)
What happens to my tracked time when I uninstall the app? Any time tracked and synced to the Vineforce cloud before you uninstalled will remain intact. However, any local offline tracking data that hadn't been synced will be lost when the data folders are deleted.
Do I need admin privileges to run these commands? No. Vineforce Teams Lite installs to the user directory, so all files and launch agents can be removed using standard user permissions.
Can I reinstall the app later? Yes. Since all configuration and agent files are wiped out, a future installation will be completely clean and act like a first-time setup. See our macOS installation guide to install again.