Asset Requests
Overview
The Asset Requests module allows employees to request organizational assets through a structured approval workflow. Administrators and asset managers can review, approve, reject, and assign assets directly from this module.
Asset Management → Asset Requests
Asset Requests Page
The Asset Requests page provides a summary dashboard at the top followed by a detailed list of all requests.
Summary Cards
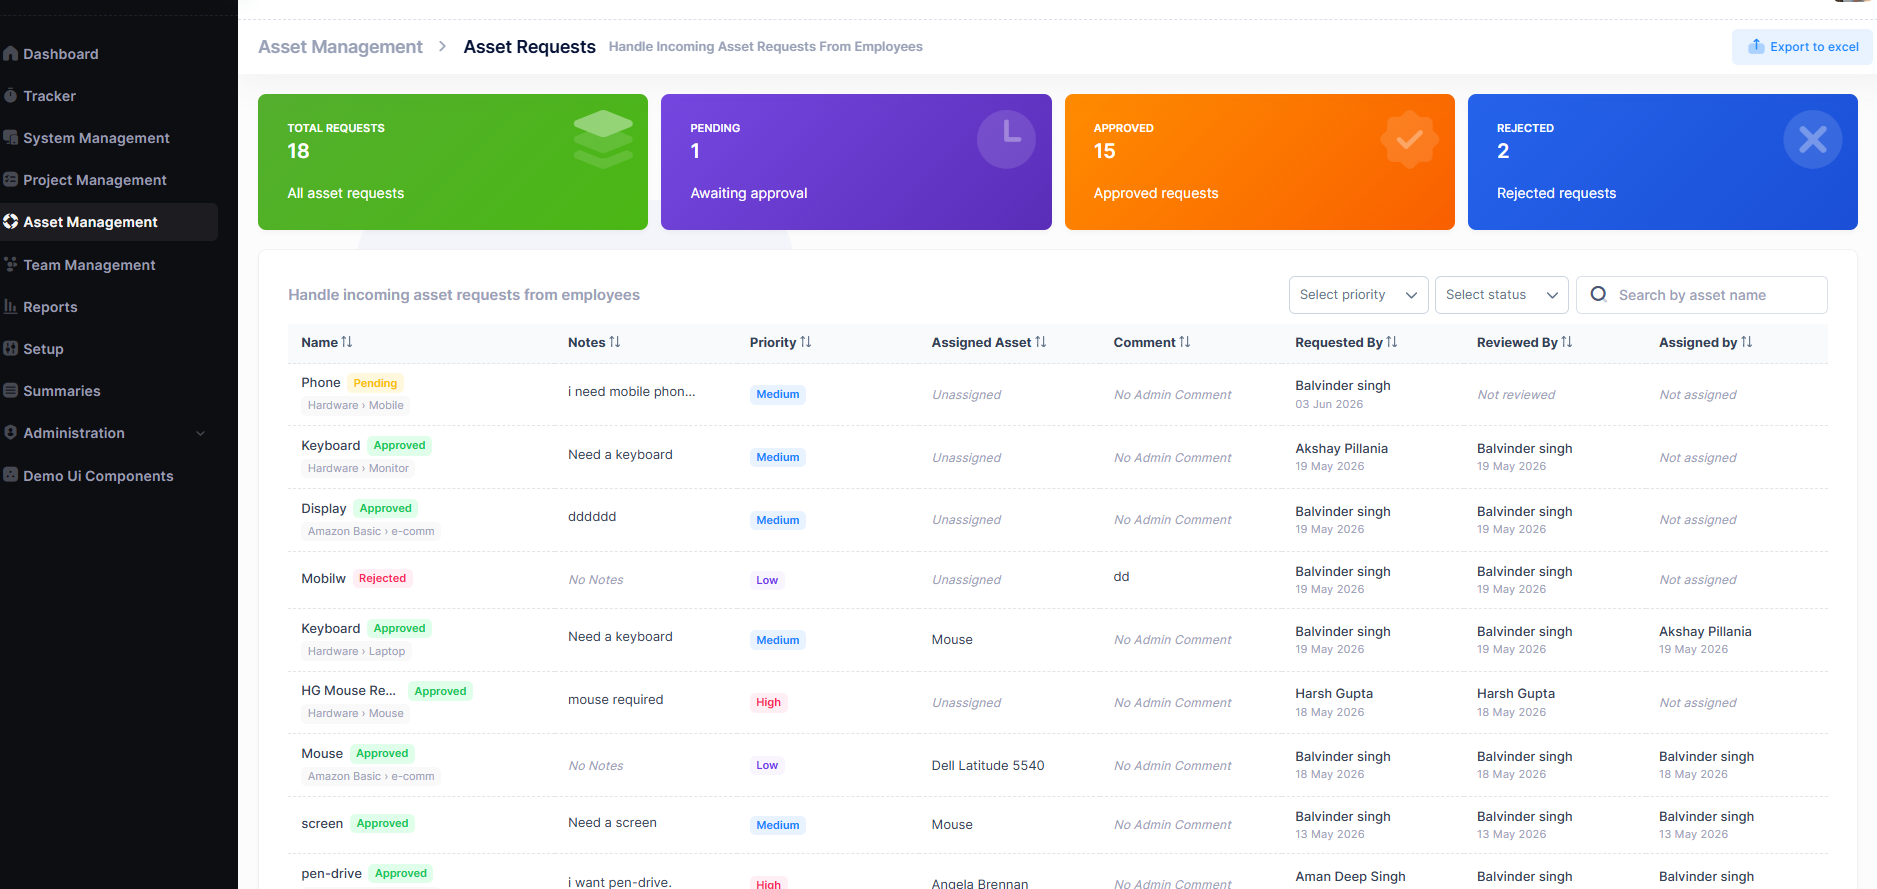
| Card | Description |
|---|---|
| Total Requests | Total number of all asset requests submitted |
| Pending | Requests awaiting review and approval |
| Approved | Requests that have been approved |
| Rejected | Requests that have been declined |
Request List Columns
Each request in the list displays the following information:
| Column | Description |
|---|---|
| Name | Asset name and type path (e.g. Hardware › Monitor) with status badge |
| Notes | Remarks or notes submitted with the request |
| Priority | Request urgency — Low, Medium, or High |
| Assigned Asset | The asset allocated to this request (or Unassigned) |
| Comment | Admin comment on the request |
| Requested By | Employee who submitted the request and date |
| Reviewed By | Admin who reviewed the request and date |
| Assigned By | Admin who assigned the asset and date |
Filters for Priority and Status are available above the list, along with a Search by asset name field. Records can be exported using the Export to Excel button.
Create an Asset Request
Asset requests can be submitted via the request icon in the top navigation bar (available across the application).
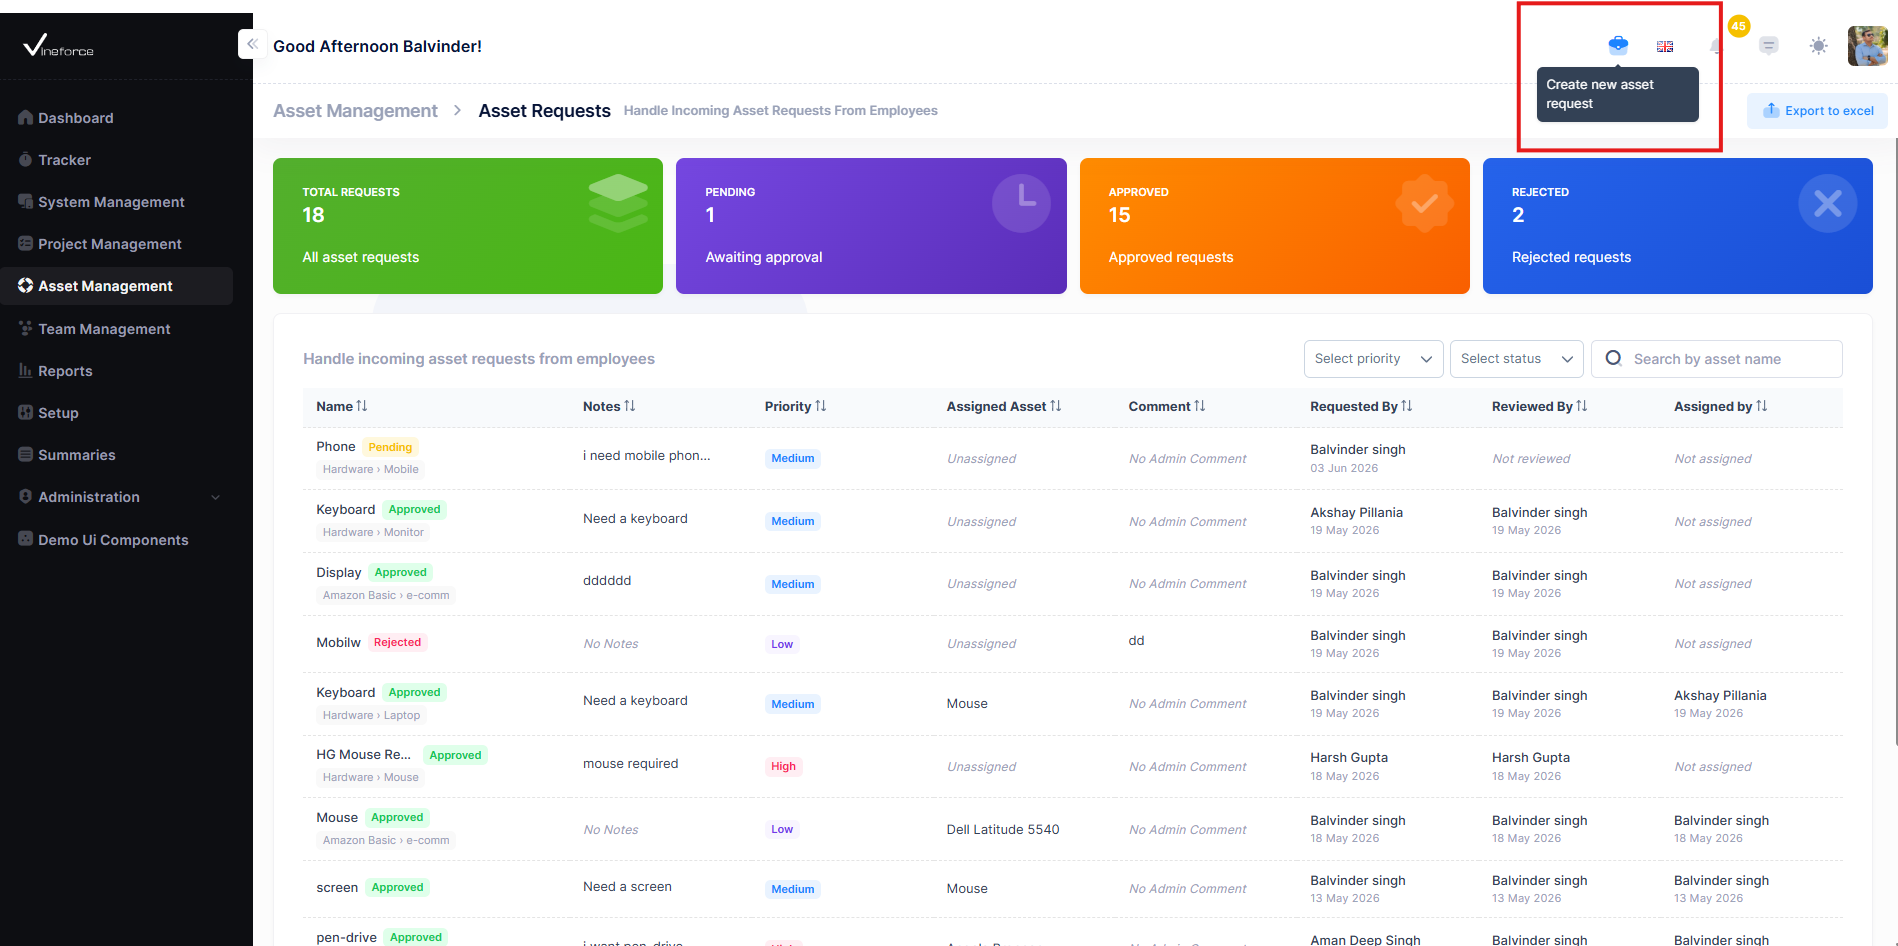
- Click the request icon in the top navigation bar or navigate to
Asset Management → Asset Requests. - Click Create new asset request.
- Fill in the required fields and click Submit request.
| Field | Description |
|---|---|
| Name | Name of the asset being requested |
| Asset Type | Category of the asset (e.g. Hardware) |
| Asset Sub-Type | Sub-category (e.g. Laptop, Monitor, Mouse) |
| Priority | Urgency level — Low, Medium, or High |
| Comments | Reason or justification for the request |
A notification is sent to the reviewer once the request is submitted.
Request Detail View
Clicking on any request opens the Asset Request Details panel, which shows the full request lifecycle and asset information.
Request Timeline
The detail view shows a 3-step progress timeline:
| Step | Description |
|---|---|
| Requested | Date and employee who submitted the request |
| Reviewed | Date and admin who reviewed the request (or "Awaiting Review") |
| Assigned | Confirmation of asset assignment (or "Pending Assignment") |
Asset Info
| Field | Description |
|---|---|
| Name | Requested asset name |
| Priority | Low / Medium / High |
| Asset Type | Asset category |
| Asset Sub-Type | Asset sub-category |
| Assigned Asset | Current assignment status |
Remarks & Admin Comment
- Remarks — Notes provided by the employee at the time of request
- Admin Comment — Feedback or reason added by the reviewer during approval or rejection
Approve or Reject a Request
Authorized users can approve or reject requests directly from the detail view.
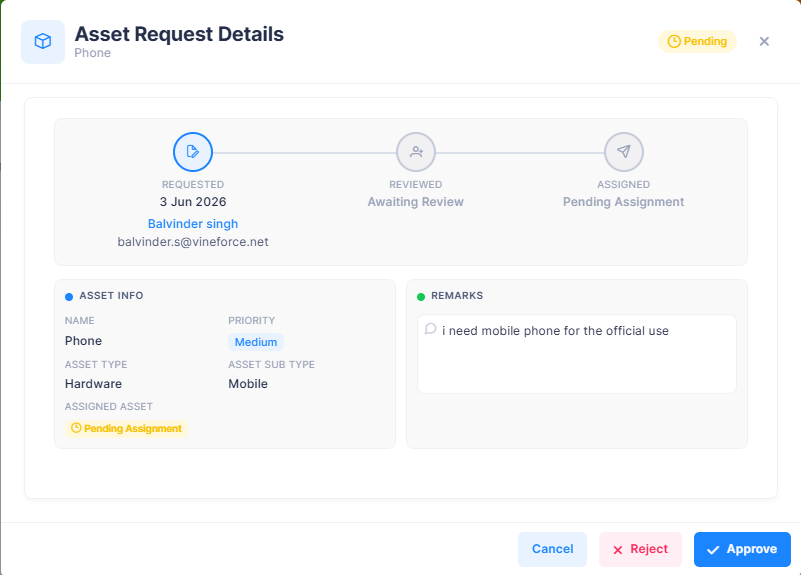
- Click Approve to approve the request — status updates to Approved
- Click Reject to decline the request — status updates to Rejected
A notification is sent to the requester when their request is approved or rejected.
Assign an Asset
Once a request is approved, an asset can be assigned to fulfil it.
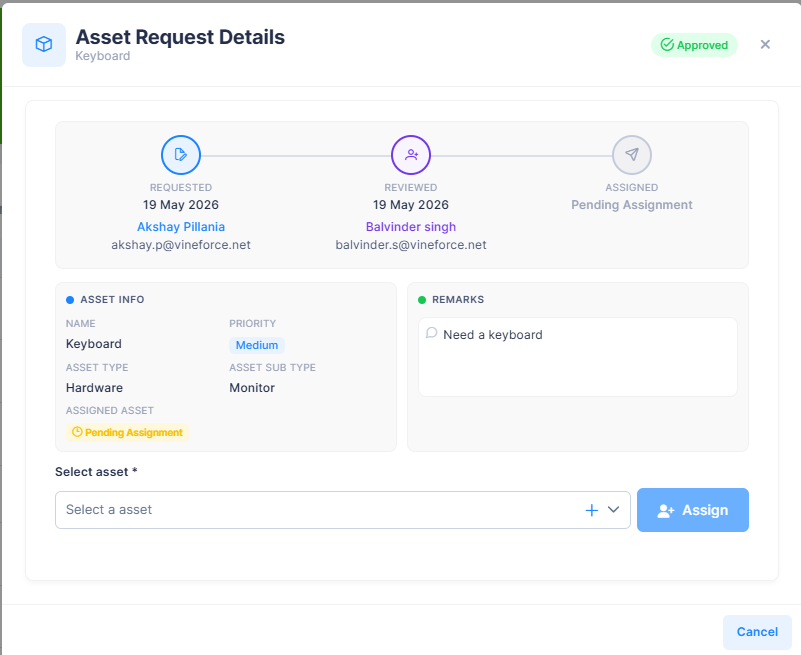
- Open the approved request.
- Use the Select asset dropdown to choose an available asset.
- Click Assign.
The request status updates and the assigned asset is reflected in the list.
A notification is sent to the requester once an asset is assigned to their request.
Request Statuses
| Status | Description |
|---|---|
| Pending | Submitted and awaiting review |
| Approved | Reviewed and approved for asset allocation |
| Rejected | Reviewed and declined |