User Management
User Management in Vineforce Teams allows administrators to manage users, roles, permissions, and account status from a centralized interface.
The module supports:
- Creating and managing users
- Assigning roles and permissions
- Activating or deactivating accounts
- Unlocking users
- Importing and exporting users via Excel
- User impersonation for support and troubleshooting
Navigation
Administration → Users
Watch the Demo
Recommended: Watch this video to see the full process of adding users, assigning roles, and managing user access in the Vineforce web portal.
What You'll Learn
In this guide, you'll learn how to:
- Add a new user by entering essential details such as name, email address, and username
- Set a secure password or generate a random password automatically
- Configure login preferences, including password reset options and account lockout settings
- Assign roles to control user permissions and access levels
- Set shift-related details such as joining date, employee code, and assigned shift
- Save the user and send a verification email to activate the account
Once the setup is complete, the user receives a verification email and must click Verify to activate their account and sign in for the first time.
Roles and Permissions
A user can have only one role.
- Permissions are inherited from the assigned role
- Administrators can also assign user-specific permissions
- User-level permissions override role-based settings
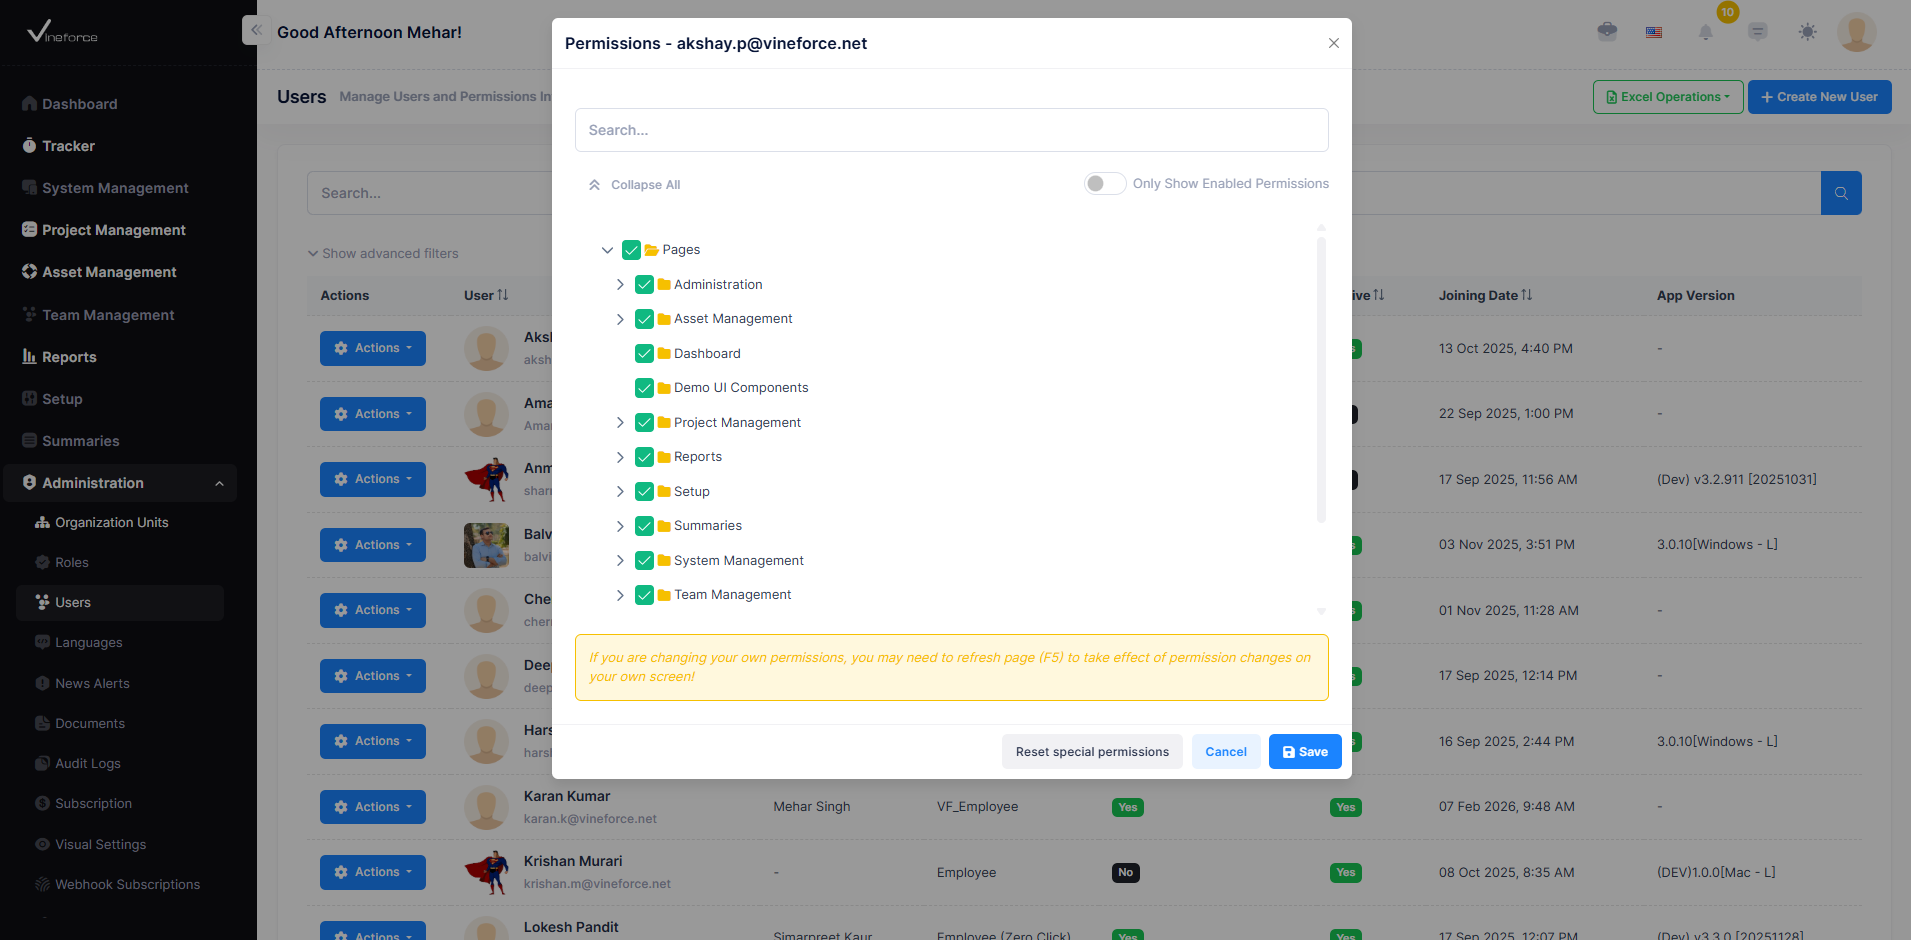
The Permissions dialog allows administrators to manage access for individual users.
Create New User
To create a user:
- Navigate to
Administration → Users - Click Create New User
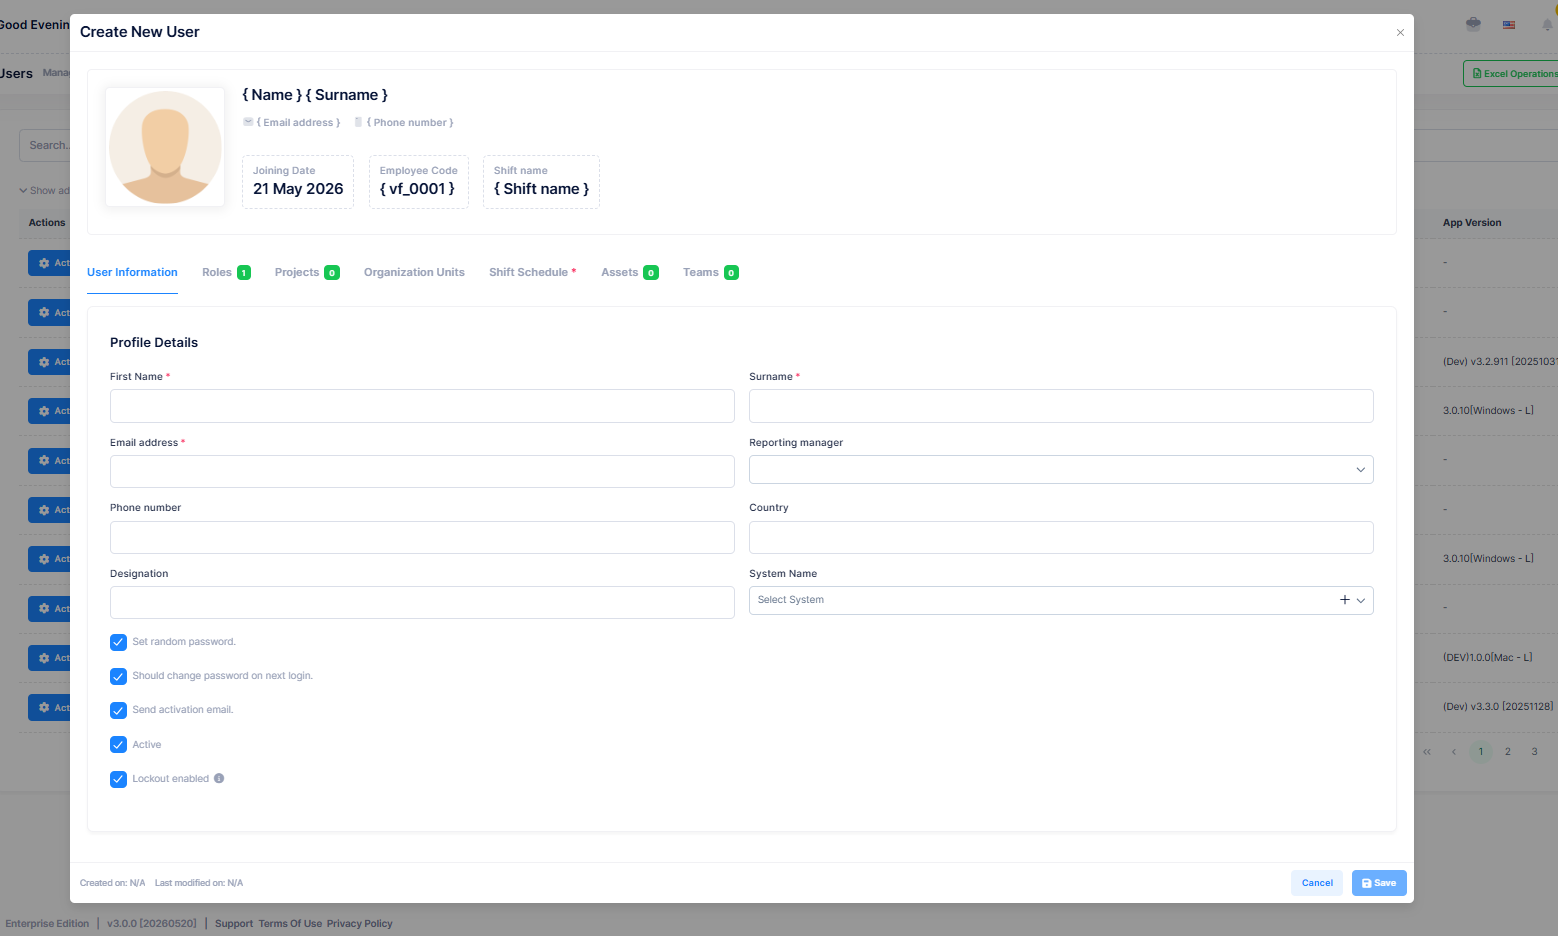
The form includes the following sections:
| Section | Description |
|---|---|
| User Information | Name, email, phone number, designation, manager, country, and system assignment |
| Roles | Assign a role |
| Projects | Assign related projects |
| Organization Units | Map users to OUs |
| Shift Schedule | Configure working shifts, joining date, and employee code |
| Assets | Assign company assets |
| Teams | Add users to teams |
Click Save to create the user or Cancel to discard changes.
User Actions
Each user has an Actions menu with the following options:

| Action | Description |
|---|---|
| Login as this user | Access the application as the selected user |
| Edit | Update user details |
| Permissions | Manage user-specific permissions |
| Unlock | Unlock the user account |
| Dynamic Properties | Manage additional user properties |
| Delete | Remove the user |
| View | View user details |
Excel Operations
The system supports importing and exporting users using Excel files.

- Download the user list as an Excel file
- Import users using the provided template
- Failed records are exported with validation errors
- Administrators receive notifications for import results
After correcting errors, failed users can be re-imported.
User Impersonation
User impersonation allows administrators to log in as another user without knowing their password. This is useful for support and troubleshooting scenarios.
To impersonate a user:
- Navigate to
Administration → Users - Open the user's Actions menu
- Click Login as this user
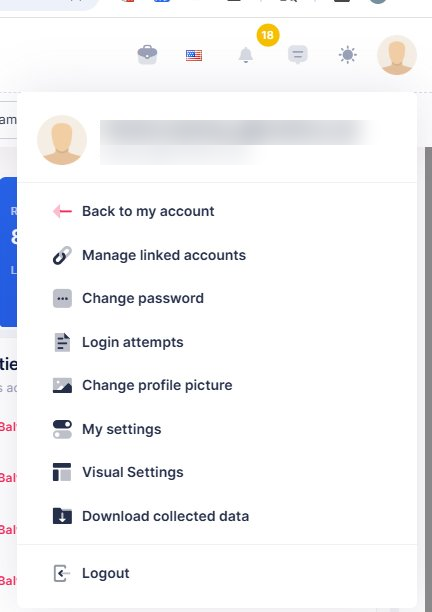
During impersonation:
- Only the selected user's permissions are applied
- Audit logs record all impersonated actions
- A Back to My Account option appears in the profile menu
What's Next?
After setting up users, you can:
- Review and configure roles from Role Management
- Monitor activity using Reports
- Review access through Account Settings
👉 Continue to Reports to monitor user activity and productivity.