Role Management
Role Management in Vineforce Teams controls who can access what inside the application.
Each user is assigned a role, and that role determines the actions they can perform, the data they can see, and how the application behaves for them.
Using roles helps keep your organization secure, organized, and easy to manage.
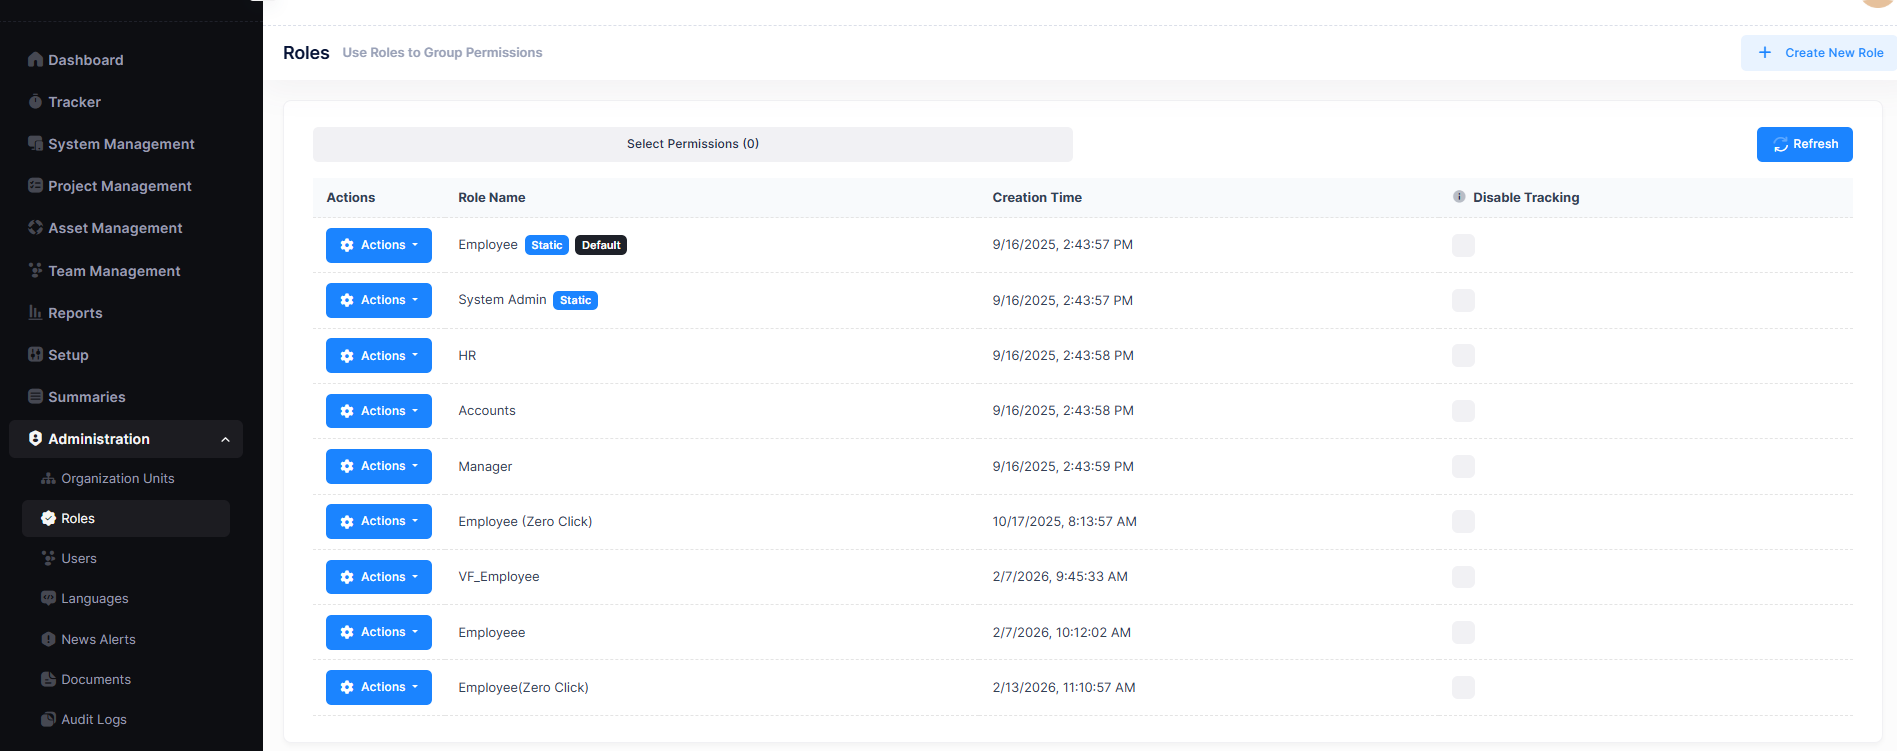
Accessing Role Management
To view and manage roles:
- Go to Administration
- Click Roles
This opens the Role Management page, which displays all available roles along with their configuration details — including role name, creation time, default role status, and tracking status.
By default, company or tenant administrators cannot create new roles.
Role creation and changes are managed by the Vineforce Teams host administrators.
If you are using the On-Premise version and require full control over roles, this can be enabled for your organization.
Please contact our support team for assistance:
Available Roles in Vineforce Teams
Vineforce Teams provides the following three built-in roles:
System Admin
The System Admin role has full access to the Vineforce Teams platform.
Users with this role can:
- Manage users and assign roles
- Configure application and account settings
- Manage projects, shifts, and policies
- View all reports and dashboards
- Monitor overall productivity and activity
This role is best suited for owners, administrators, and senior managers.
Employee
The Employee role is designed for regular team members.
Users with this role:
- Have their work activity tracked during working hours
- Use the desktop application normally
- Appear in productivity and activity reports
- Do not have access to administrative or configuration settings
This is the default role for most employees.
Employee (Zero Click)
The Employee (Zero Click) role is designed for silent, background tracking.
Users with this role:
- Do not need to interact with the application
- Are tracked automatically without manual actions
- Typically use Silent Mode (Lite)
- Experience no pop-ups or user interface interruptions
This role is ideal for:
- Large-scale enterprise deployments
- Centrally managed systems
- Environments where user interaction should be minimal
How Roles Affect Access
Roles control access in a simple way:
- Users automatically receive access based on their role
- Permissions are applied instantly
- Changes to a role affect all users with that role
This approach ensures consistent access control without manual adjustments.
Role Separation Between Companies
Each company or tenant in Vineforce Teams operates independently.
- Roles are isolated per company
- Changes in one company do not affect others
- Data and access remain secure
This ensures privacy and proper access control across organizations.
Administrator: Role Configuration
The following section is intended for On-Premise administrators who have full role management enabled.
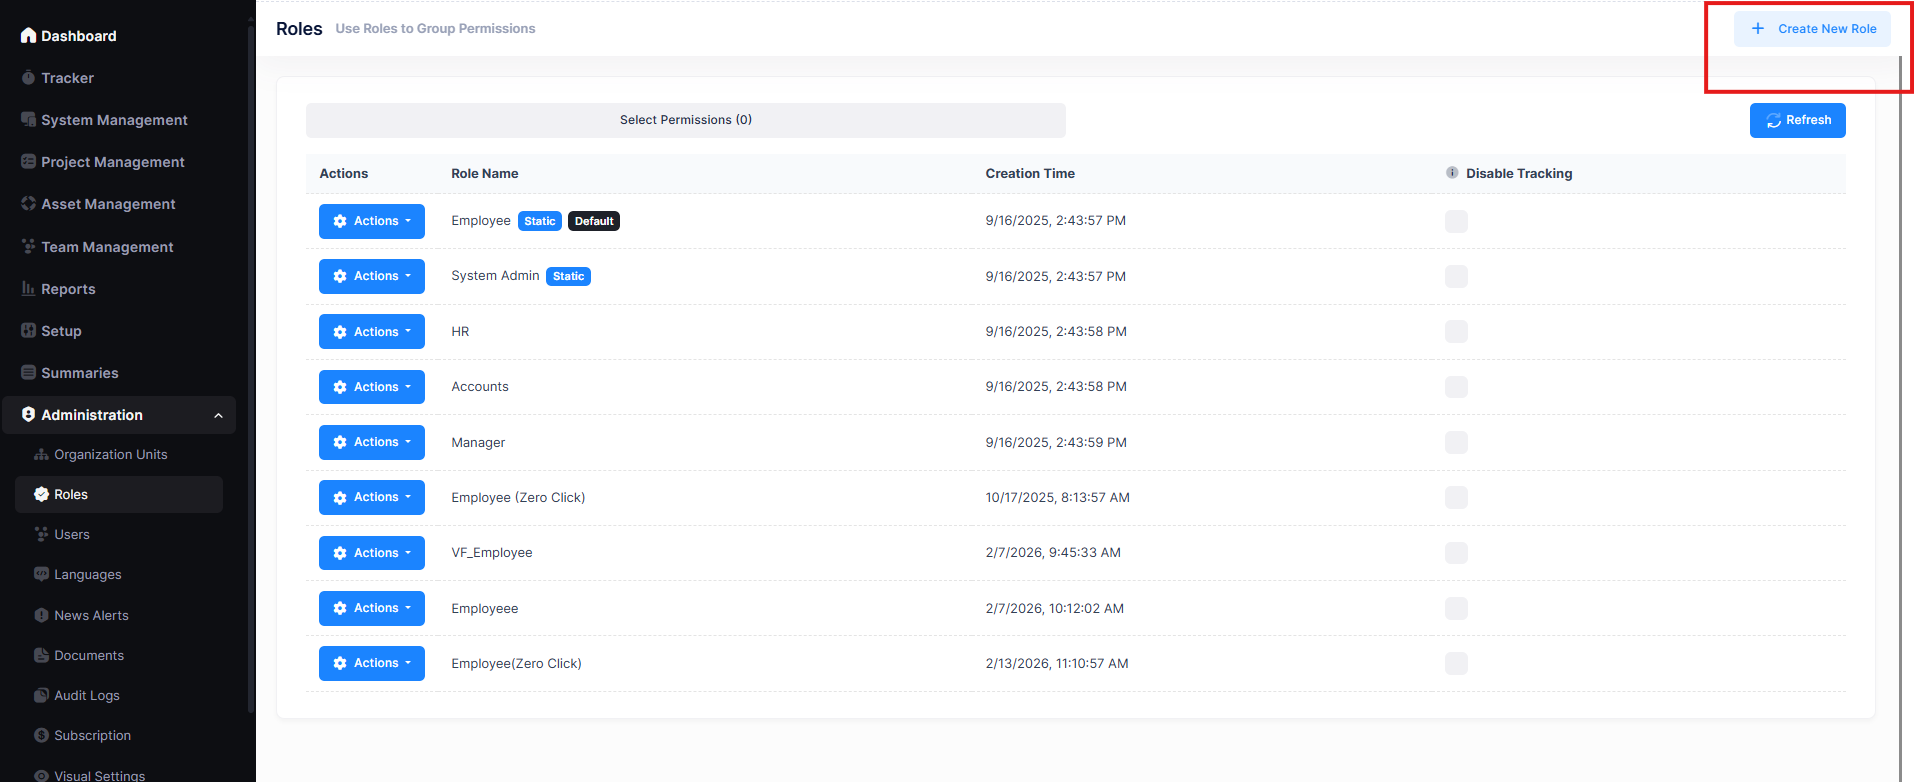
Create New Role
- Navigate to
Administration → Roles - Click + Create New Role
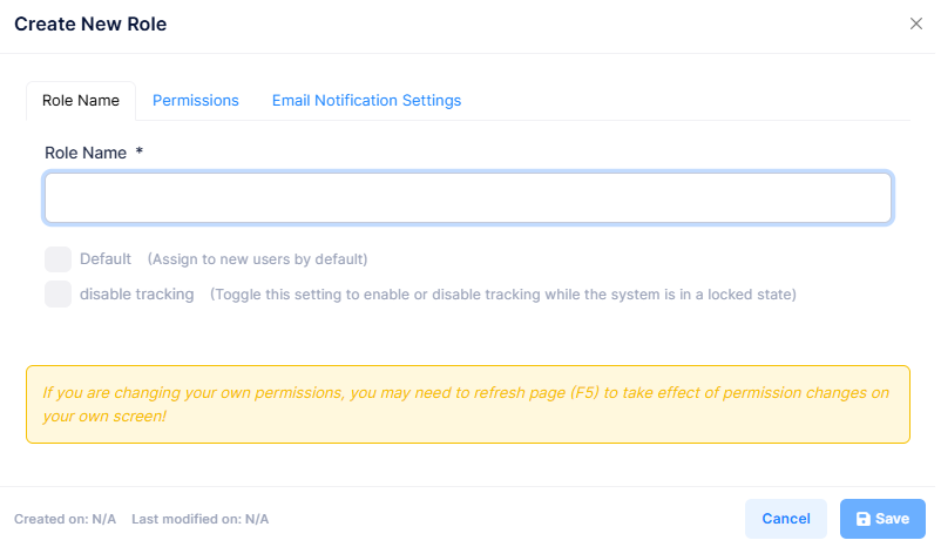
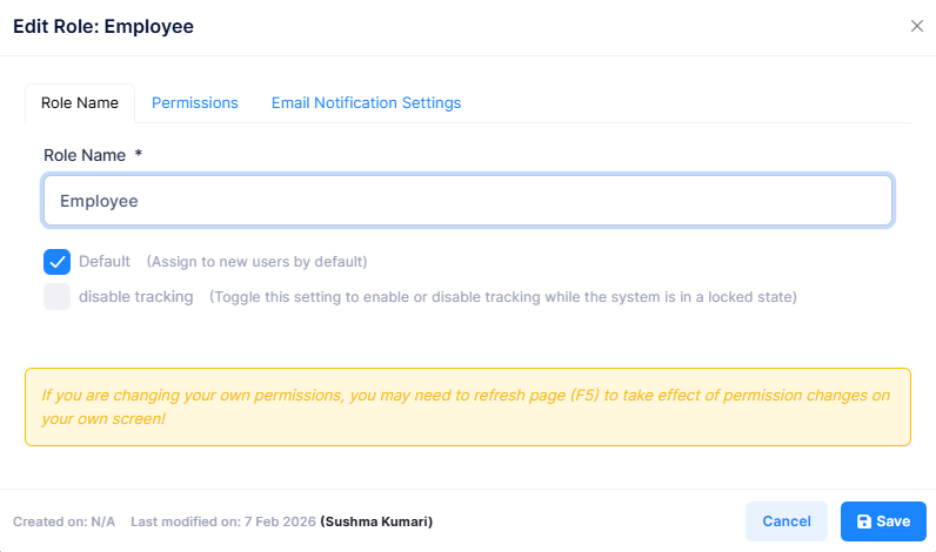
| Field | Description |
|---|---|
| Role Name | A unique name such as HR, Manager, or Team Lead |
| Default Role | Auto-assigns this role to newly created users |
| Disable Tracking | Disables activity tracking for users in this role |
Permissions
Controls module and page access for the selected role.
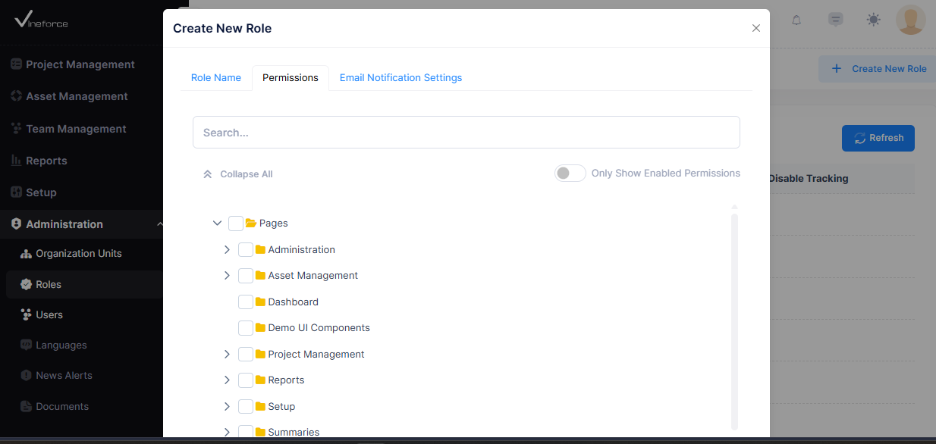
Features:
- Permission search
- Expand/collapse permission groups
- Folder-based permission hierarchy
- Checkbox-based access control
- Only Show Enabled Permissions filter
Email Notification Settings
Controls automated reports sent to users assigned to the role.
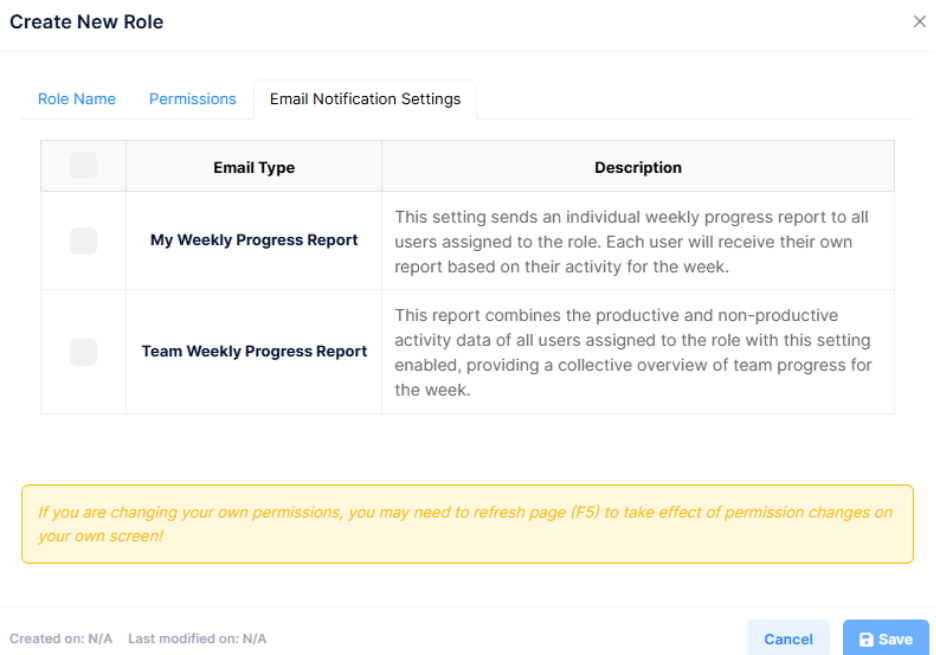
| Notification | Description |
|---|---|
| My Weekly Progress Report | Sends individual weekly progress reports |
| Team Weekly Progress Report | Sends team-level weekly progress reports |
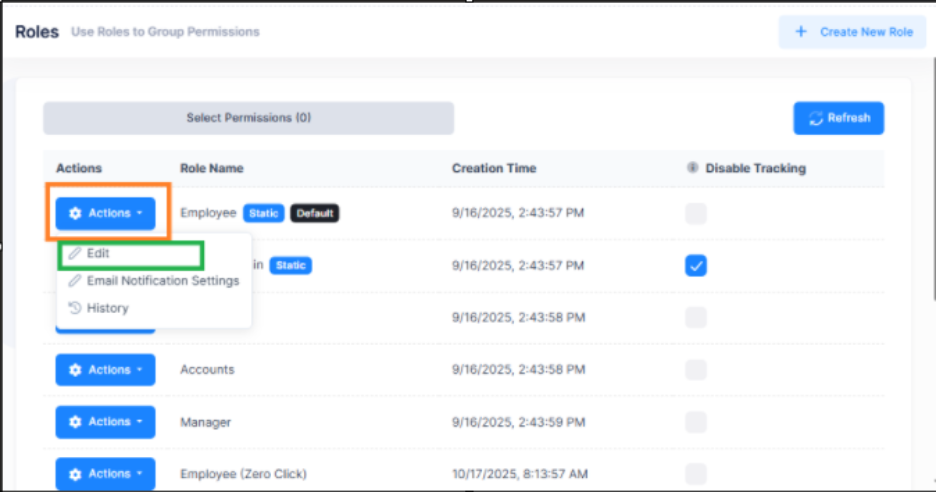
Edit Existing Role
- Click Actions beside the role
- Select Edit
- Update the required settings
- Click Save
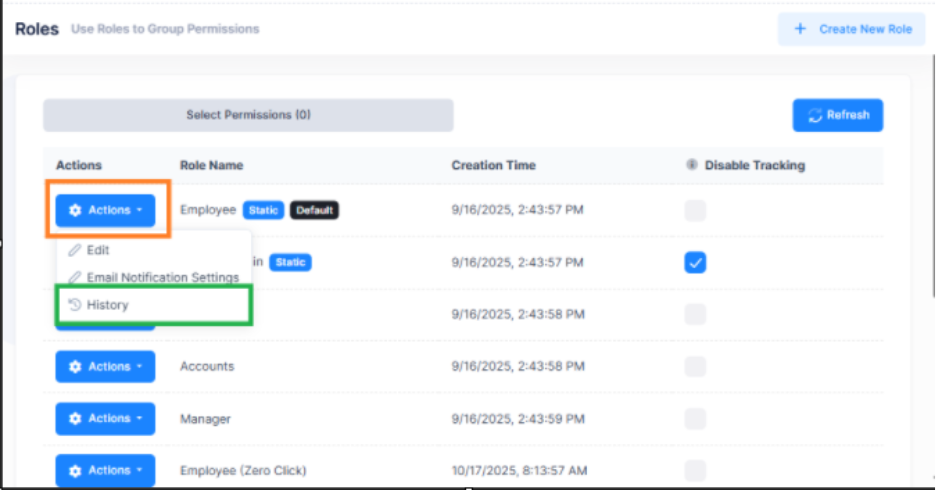
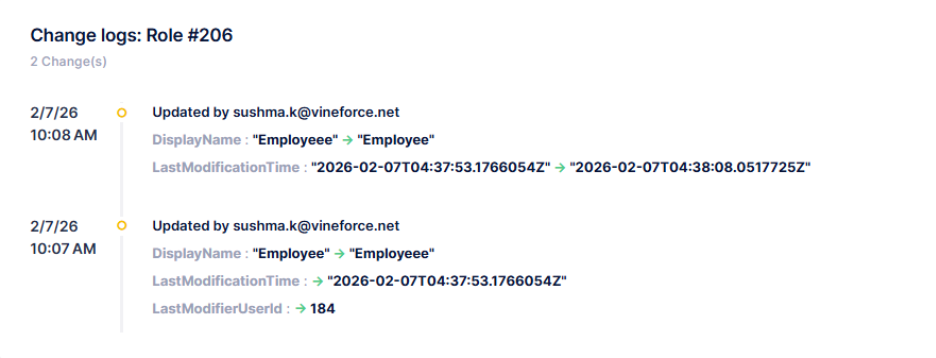
Role History
- Click Actions
- Select History
Displays a log of all role-related changes and updates.
Tracking Management
Enable or disable activity tracking per role using the Disable Tracking toggle in the role configuration settings.
![]()
Best Practices
- Assign System Admin only to trusted users
- Use Employee for most team members
- Use Employee (Zero Click) for silent or automated tracking scenarios
- Review role assignments periodically as teams grow
What's Next?
After understanding roles, you can:
- Assign roles when adding users
- Manage users from User Management
- Review access through Account Settings
- Monitor activity using Reports
👉 Continue to User Management to manage users and their roles.